FAQ
 Drag & Drop Editor
- Modules Overview
- Accordion Module
- Audio Module
- Button Module
- Callout Module
- Call to Action Module
- Contact Form Module
- Content Slider Module
- Countdown Module
- Gallery Module
- Heading Module
- HTML Module
- Icon Module
- Icon Group Module
- Link to a PDF
- Map Module
- Menu Module
- Number Counter Module
- Photo Module
- Posts Carousel Module
- Posts Module
- Posts Slider
- Pricing Table Module
- Text Editor Module
- Separator Module
- Sidebar Module
- Slideshow Module
- Subscribe Form Module
- Tabs Module
- Testimonials Module
- Video Module
Update DNS Records in Google Domains
Your domain contains a series of records that point to where different services are located, for example your email and website.
login to Google Domains
- On your computer, sign in to Google Domains.
- Locate your domain name under the My Domains Section
- Click Manage

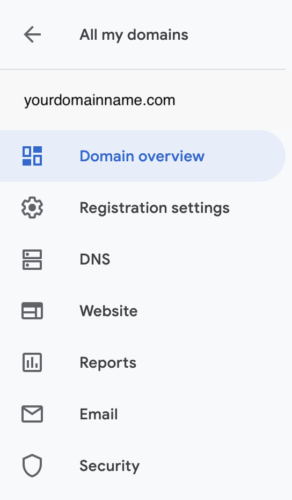
- On the left-hand side you should see the option to manage your DNS settings
- Click on DNS in the left-hand menu

to manage domain name servers
When you registered your domain with Google Domains, you chose the default Google name servers or custom name servers. You can find and change your selection with these steps:
- At the top of the page, click Custom name servers.
- Your current setting has “(Active)” next to it.
- In the “Name Servers” field(s), enter a custom name server. If you can't find the field(s), at the upper right corner, click Manage Name Servers.
- Tip: Name servers typically appear like domain names. For example, ns-cloud-e1.googledomains.com.
- Repeat Step 5 for your second name server.
- For each name server after the first 2, click +Add another name server.
- Click Save.
- If you haven’t added custom name servers before, click Switch to these settings.
to add or edit an A record
- In the DNS section scroll down to the Custom resource records section. Here you can add and/or edit your DNS records.
- To change what record you are adding you can select from the dropdown.
To add a new A record
- To change what record you are adding you can select from the dropdown.
- Choose "A" Record
- Add the IP address that we provided

- Add the Name = @
- Add the Type = A
- Add the TTL = 1h
- Add the Data = The number that we provided
- Click Add
To change an A record
- Click on the A Record
- Paste the new IP address that we provided
- Click Save