FAQ
 Drag & Drop Editor
- Modules Overview
- Accordion Module
- Audio Module
- Button Module
- Callout Module
- Call to Action Module
- Contact Form Module
- Content Slider Module
- Countdown Module
- Gallery Module
- Heading Module
- HTML Module
- Icon Module
- Icon Group Module
- Link to a PDF
- Map Module
- Menu Module
- Number Counter Module
- Photo Module
- Posts Carousel Module
- Posts Module
- Posts Slider
- Pricing Table Module
- Text Editor Module
- Separator Module
- Sidebar Module
- Slideshow Module
- Subscribe Form Module
- Tabs Module
- Testimonials Module
- Video Module
Add a Column Block to a Page or Post
The following instructions are for the native WordPress Editor
If your website uses our Drag & Drop Editor (it should!), please use the link below instead of the instructions on this page.
Drag & Drop Editor Instructions
If you don't see the Drag & Drop Editor button at the top of your website's pages and posts (as shown above), please contact us to have it installed.
Columns contain two or more text/paragraph areas.
- Click to add a new “Block” (section) of content and choose COLUMNS.
- Type or Paste the text content into the column areas
- Format the text as desired using the Text Formatting Toolbar
- Choose to make all or part of the text Bold, Italic or a link to another website.
- Select the text you want to format and click the appropriate button.


- Format the Column as desired using the
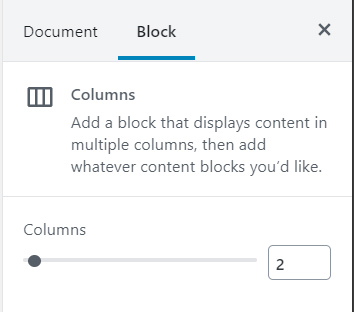
Column Block Settings on the right side of the screen. - If you don’t see the Document and Block settings palette:
- Click in the top left corner
- Under Columns, choose the number of columns
TIP: Each Column in a Column Block is a treated as a separate Paragraph and can be formatted in all the same ways.
Clicking on the outer edge of the Column Block will allow you to edit the Column. Clicking on the inner Paragraphs will allow you to edit the Paragraph settings.
