FAQ
 Drag & Drop Editor
- Modules Overview
- Accordion Module
- Audio Module
- Button Module
- Callout Module
- Call to Action Module
- Contact Form Module
- Content Slider Module
- Countdown Module
- Gallery Module
- Heading Module
- HTML Module
- Icon Module
- Icon Group Module
- Link to a PDF
- Map Module
- Menu Module
- Number Counter Module
- Photo Module
- Posts Carousel Module
- Posts Module
- Posts Slider
- Pricing Table Module
- Text Editor Module
- Separator Module
- Sidebar Module
- Slideshow Module
- Subscribe Form Module
- Tabs Module
- Testimonials Module
- Video Module
Add a Table to a Page or Post
The following instructions are for the native WordPress Editor
If your website uses our Drag & Drop Editor (it should!), please use the link below instead of the instructions on this page.
Drag & Drop Editor Instructions

If you don't see the Drag & Drop Editor button at the top of your website's pages and posts (as shown above), please contact us to have it installed.
Tables are a perfect way to show charts and data.
- Click to add a new “Block” (section) of content and choose TABLE.
- Choose the Number of Columns and Rows. This can be changed later.
- Click Create
- Enter the Table Content
- Format the Table as desired using the Table Formatting Toolbar
- Choose the Table's alignment
- Edit the Table by adding or deleting a row or column
- Choose to make all or part of the text Bold, Italic or a link to another website.

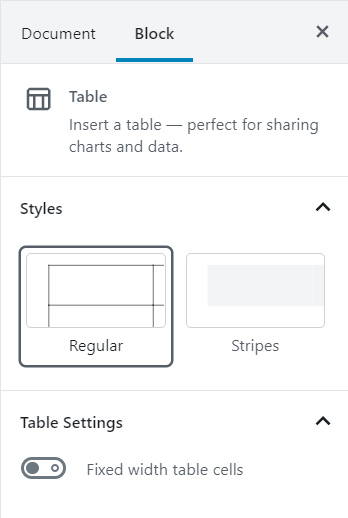
- Format the Table as desired using the Table Block Settings on the right side of the screen.
- If you don’t see the Document and Block settings palette:
- Click in the top left corner
- Under Styles, choose Regular (borders) or Stripes
- Under Table Settings, choose whether to have the table cells a fixed width or for the width to be determined by the content.